

How To Add Html To Shopify Blog

Interestingly, you can insert blogs into your online shop, and post all updated information about your products or business to those blogs. Adding a blog to your online shop brand on Shopify is one of the most useful ways to help drive traffic into your site, which supports the increase in your store' SEO, and customers' engagement. If you don't want your blog post to be shown on your Shopify store, you can delete your blog posts as well.
In fact, any stores on Shopify have default blogs named News. There are two options that you can keep this kind of blog or create blogs yourself with the custom name.
In this writing, you will be shown how to add a blog on Shopify on Desktop, iPhone, and Android.
How to add a blog on Shopify
- Step 1: Select Blog Posts
- Step 2: Choose Manage blogs
- Step 3: Click Add blog
- Step 4: Complete your blog
- Step 5: Press Save
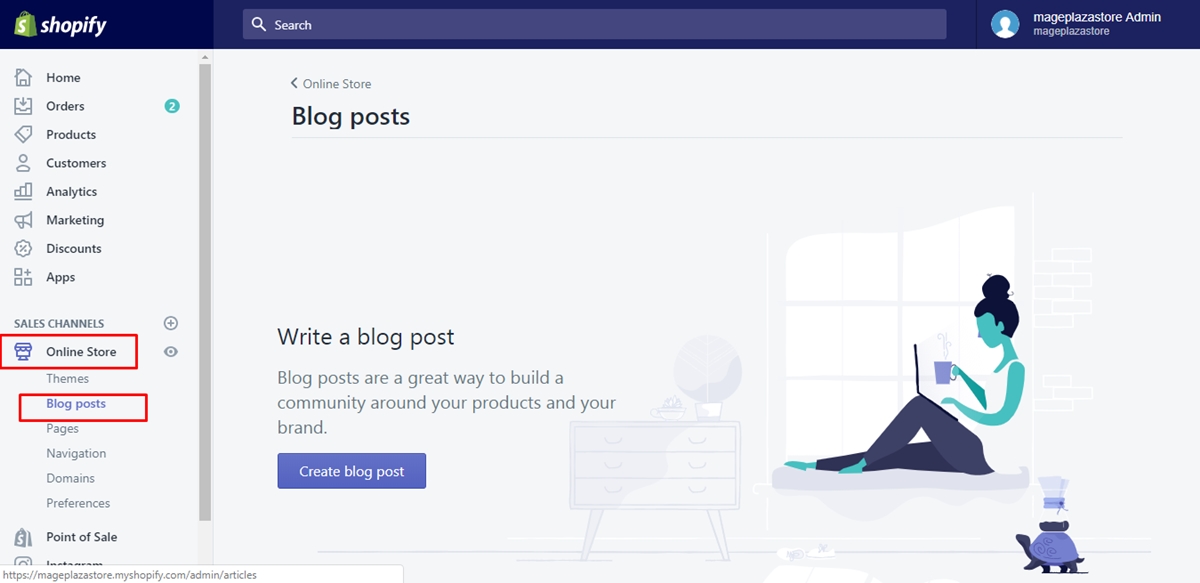
Step 1: Select Blog Posts.
The first thing you need to do is to select Online Store > Blog Posts after logging into your Shopify admin.
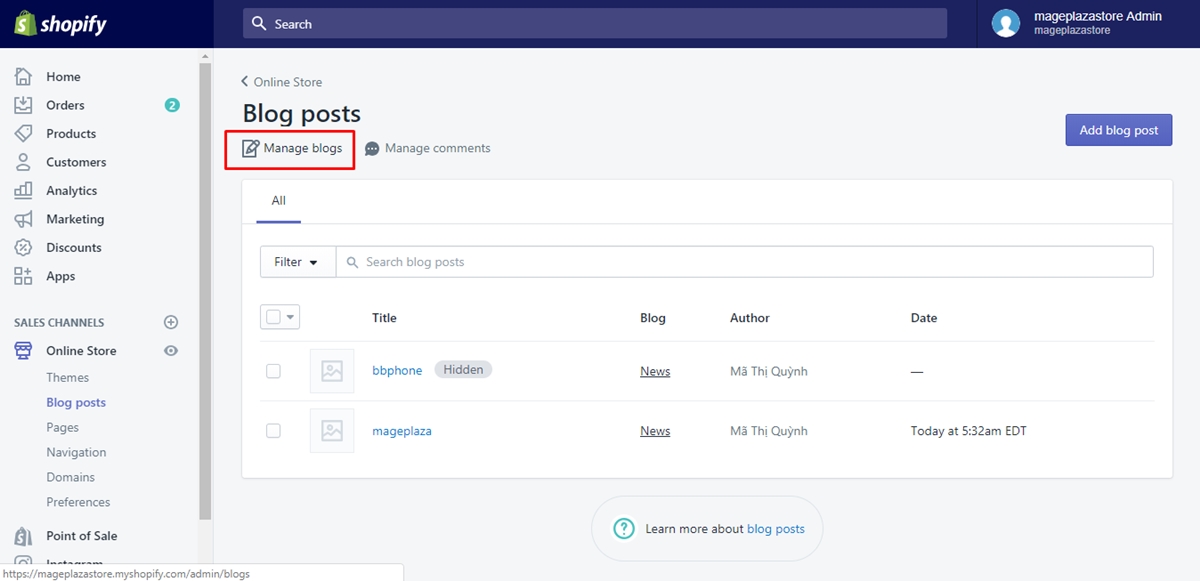
Step 2: Choose Manage blogs.
After that, you can choose Manage blogs.
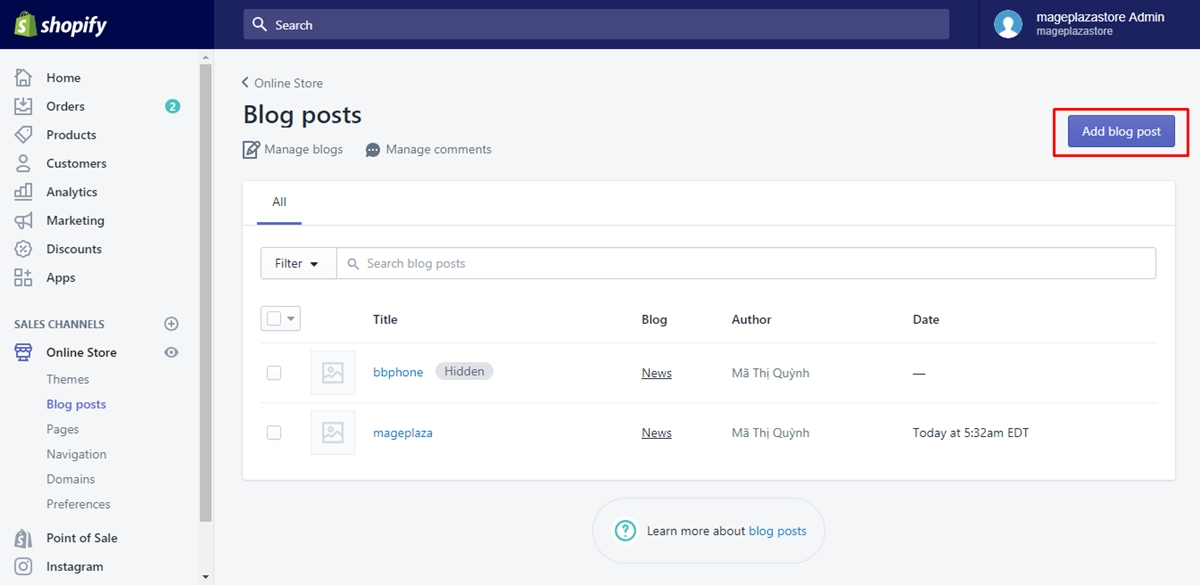
Step 3: Click Add blog.
The, click Add blog to continue.
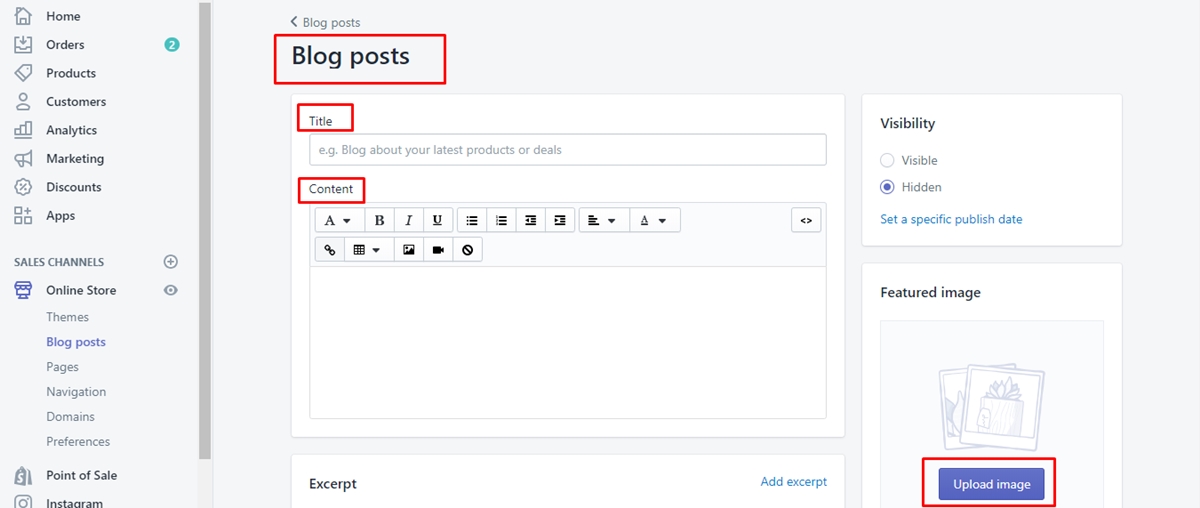
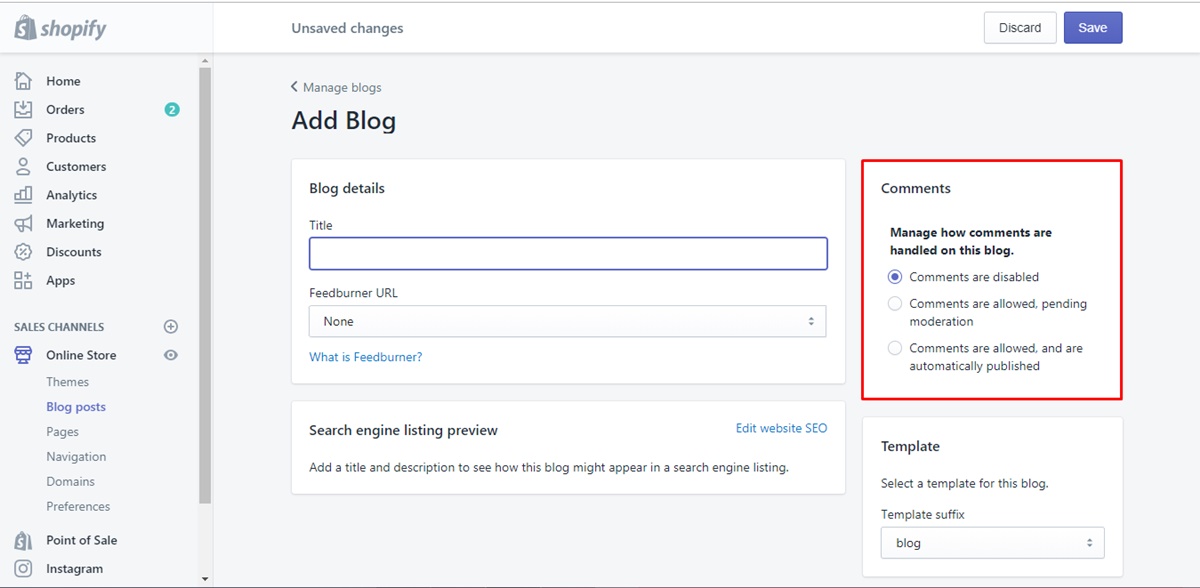
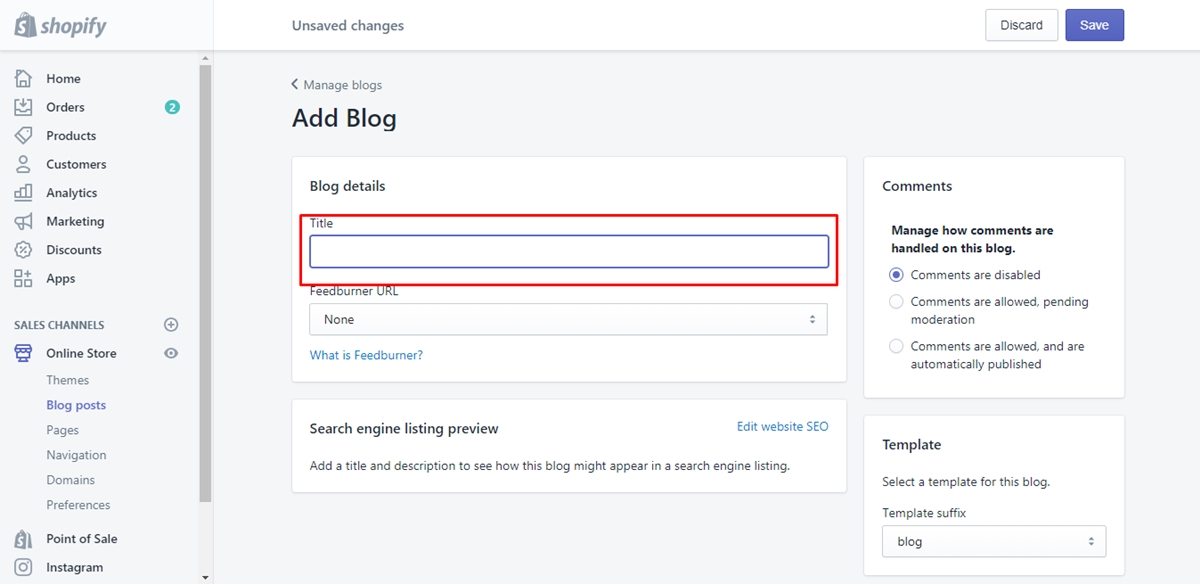
Step 4: Complete your blog.
In this step, you have to complete your blog, including giving it a title and content and select how you manage your blog's comments.
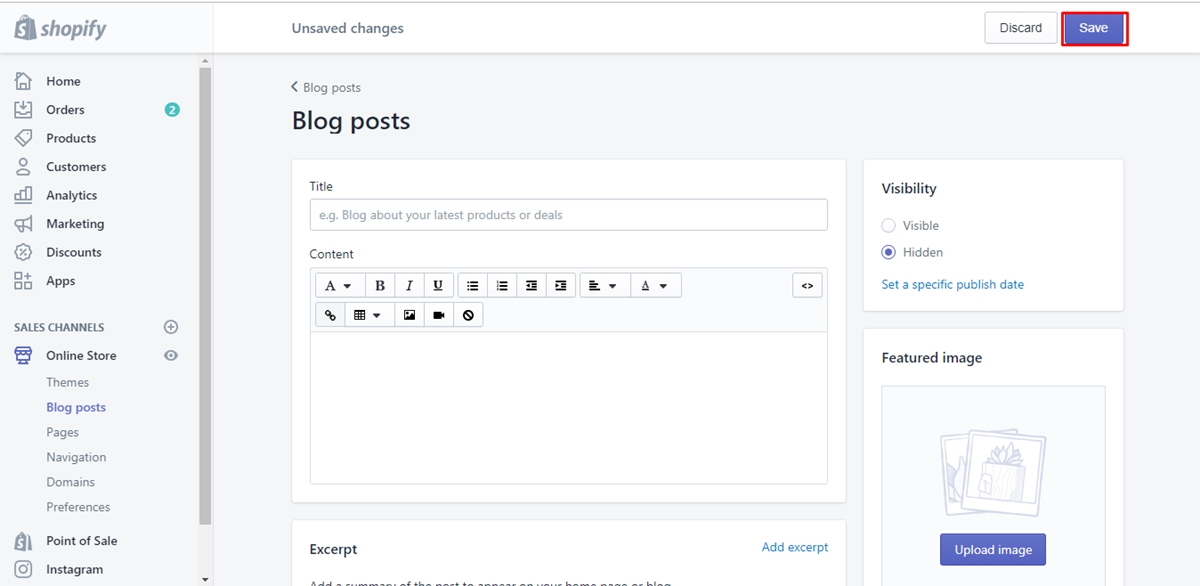
Step 5: Press Save.
Last but not least, save your created blog by clicking Save.
To add a blog on iPhone (Click here)
-
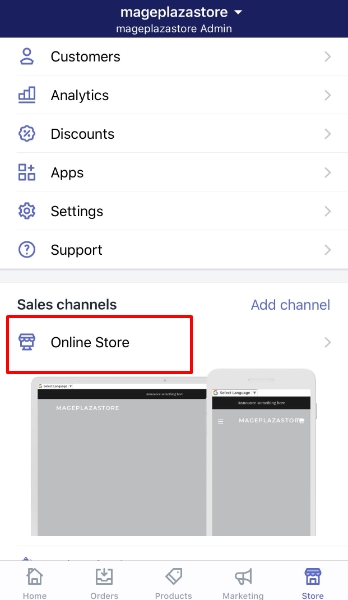
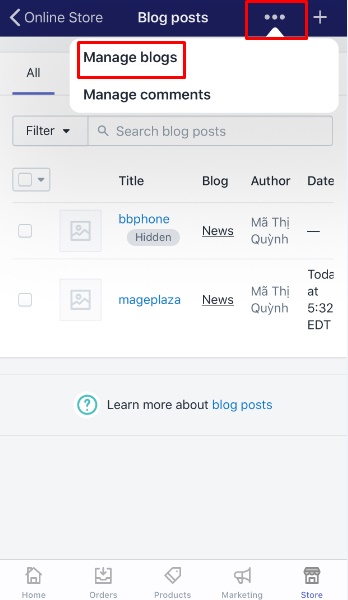
Step 1: Go to Store.
First, you can go toStorefrom the bottom of the Shopify app page. -
Step 2: Tap Online Store.
Second, tapOnline Storefrom theSale channeslsection.
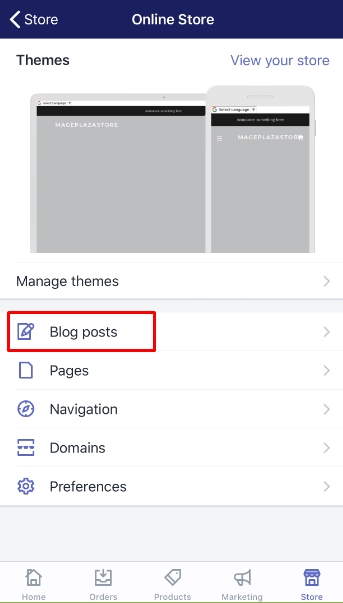
- Step 3: Tap Blog posts.
In this step, you can tapBlog poststo continue.
- Step 4: Tap the button
…and choose Manage blogs.
Next, tap the button…next toBlog postsand chooseManage blogs.
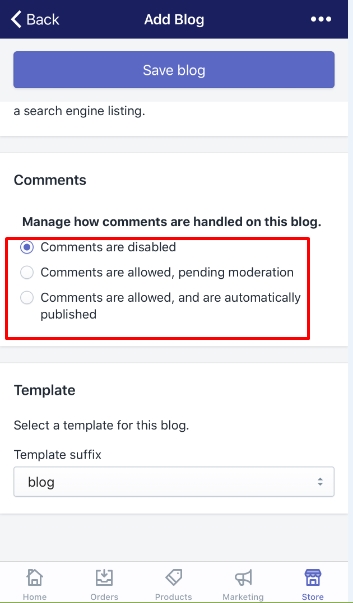
- Step 5: Select the
+button and complete your blog.
The, select the+button and complete your blog such as its title and opt for the way you manage its comment.
- Step 6: Tap Save blog.
Finally, don't forget to tapSave blogto save your new blog.
To add a blog on Android (Click here)
-
Step 1: Touch Store.
After logging in, you can touchStore. -
Step 2: Touch Online Store.
Then, touch Online Store from theSale channelssection. -
Step 3: Choose Blog posts, then touch Manage blogs.
In this step, you chooseBlog poststo keep going. -
Step 4: Select the
⋮button next to Blog posts, then Manage blogs.
Next, you can select the⋮button next to Blog posts, thenManage blogs. -
Step 5: Choose the
+button and finish your blog.
You can choose the+button and get your blog completed by giving it a title and remembering to choose how you will manage your blog's comment. -
Step 6: Touch Save blog.
Don't forget to touchSave blog.
Take note that, after you can create your new blog, you can add it to the main navigation list.
Conclusion
As you can see, we hope that, with the above steps on how to add a blog on Shopify, you can add blogs to your online store without having any difficulties. Setting up blogs on Shopify store is considered helpful to in converting the visitors into the customers. I hope you enjoy this post, if you want more, check out our Shopify tutorials.
Related Posts:
- How to Create a New Blog Template on Shopify
- 4 Steps to Publish Blog Posts in Bulk on Shopify
- How to Set a Specific Publish Date for a Blog Post on Shopify
- How to Edit a Blog Name on Shopify
- How to Edit a Blog Post on Shopify
How To Add Html To Shopify Blog
Source: https://avada.io/shopify/docs/how-add-blog-shopify.html
Posted by: jacksonpeand1935.blogspot.com
0 Response to "How To Add Html To Shopify Blog"
Post a Comment